
Knitted bear-free knitting pattern
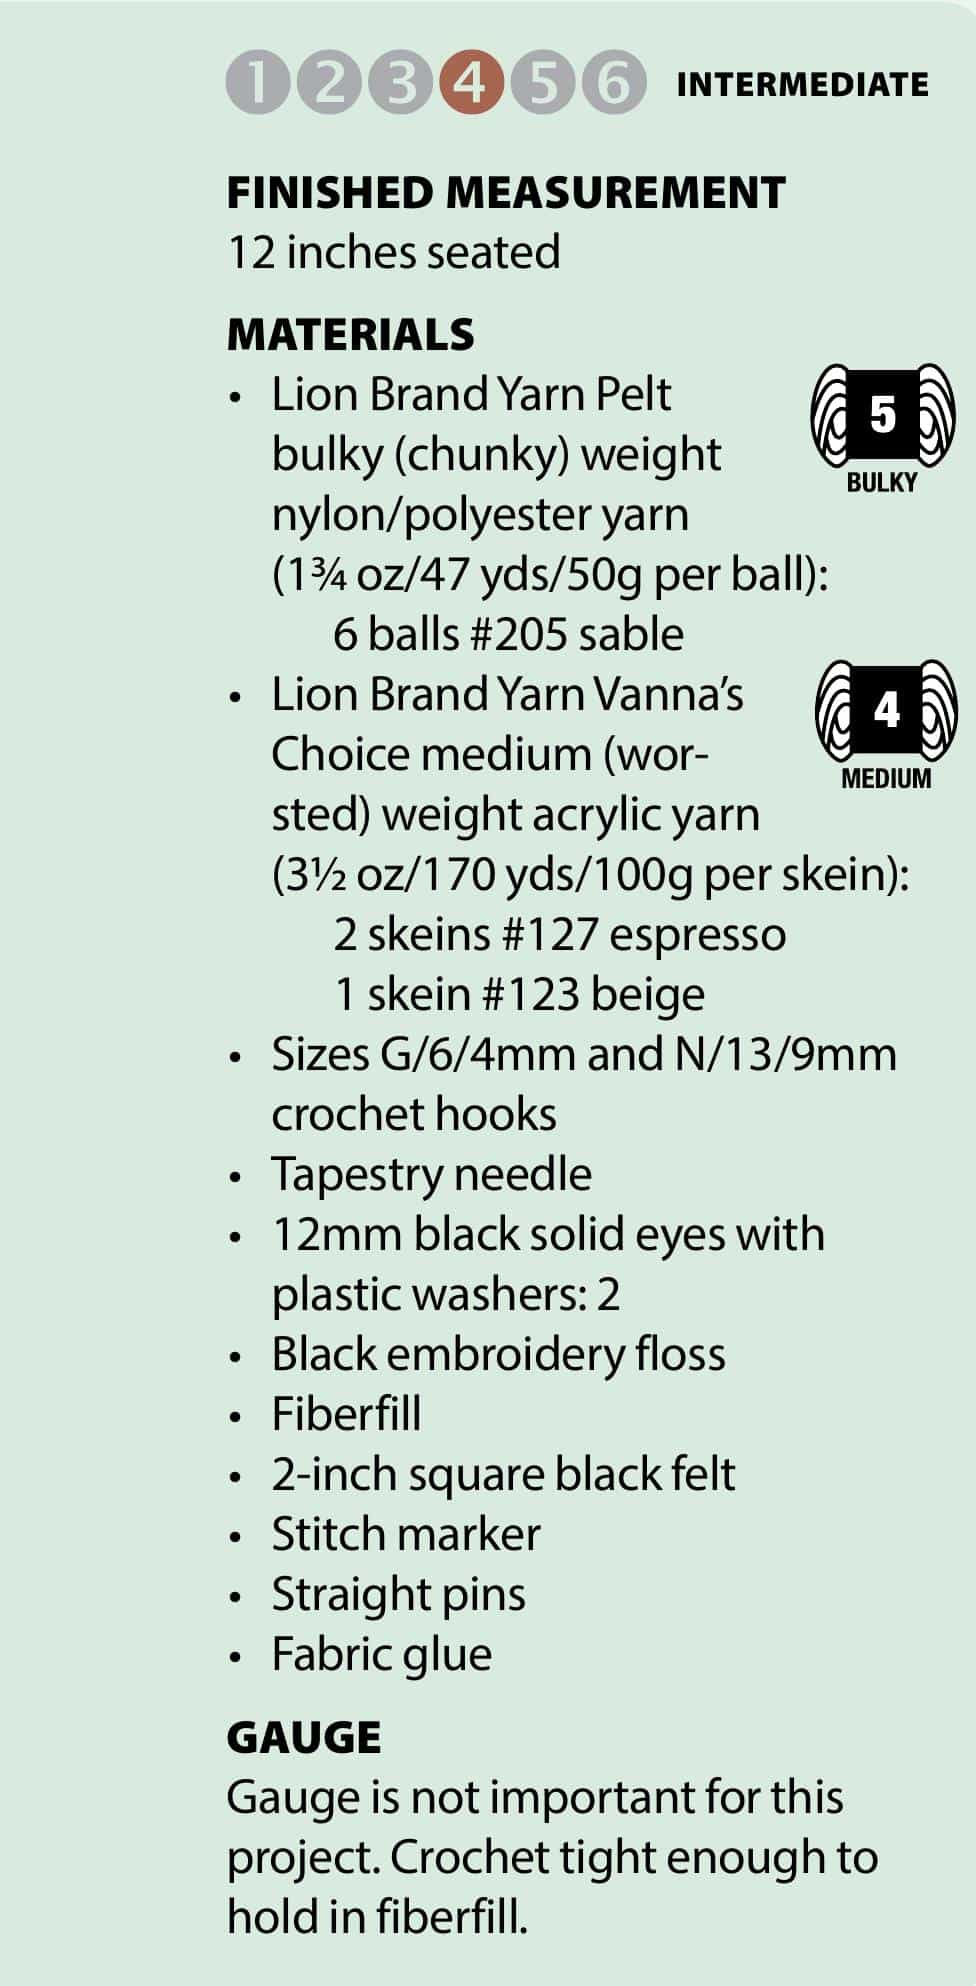
FINISHED MEASUREMENT
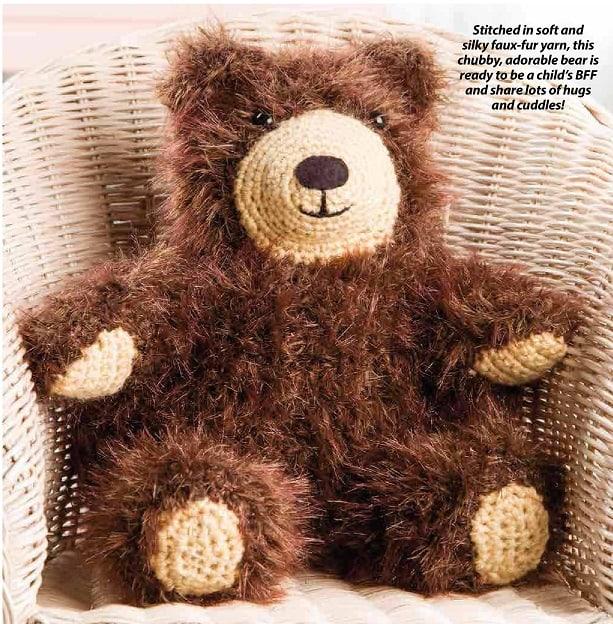
12 inches seated
MATERIALS
PATTERN NOTES
Weave in loose ends as work progresses.Do not join rounds unless otherwise stated. Place stitch marker
at end of round and move up as work progresses.Join with slip stitch as indicated unless otherwise stated
BEAR
BACK OF HEAD
Row 1: With size N hook and 1 strand each espresso and sable, beg at bottom of Back of Head,
ch 8, sc in 2nd ch from hook, sc in each rem ch across, turn. (7 sc) Row 2: Ch 1, sc in each sc
across, turn. Row 3: Ch 1, 2 sc in first sc, sc in each sc across to last sc, 2 sc in last sc, turn. (9 sc)
Row 4: Rep row 3. (11 sc) Row 5: Ch 1, sc dec (see Stitch Guide) in next 2 sc, sc in each sc
across to last 2 sc, sc dec in next 2 sc, turn. (9 sc) Row 6: Rep row 2.Row 7: Rep row 5. (7 sc)
Row 8: Rep row 2.Row 9: Rep row 5. (5 sc) Row 10: Rep row 2.Row 11: Ch 1, sc dec in next 2 sc, sc in next sc, sc dec in next
2 sc. Fasten off. (3 sc)
FOREHEAD
Row 1: With size N hook and 1 strand each espresso and sable, beg at bottom of Forehead, ch 8, sc in 2nd ch from hook, sc in each rem ch across, turn. (7 sc) Row 2: Ch 1, sc in each sc across, turn. Row 3: Rep row 2.Row 4: Ch 1, sc dec in next 2 sc,
sc in each of next 3 sc, sc dec in next 2 sc, turn. (5 sc)Row 5: Ch 1, sc dec in next 2 sc, sc in next sc, sc dec in next 2 sc,turn. (3 sc)
Rows 6 & 7: Rep row 2. At the end of row 7, fasten off.
SIDE OF HEAD
Make 2. Row 1: With size N hook and 1 strand each espresso and sable, beg at top of Side of Head, ch 8, sc in 2nd ch from hook, sc in each rem ch across, turn. (7 sc) Rows 2–12: Ch 1, sc in each sc across, turn. At the end of row 12, fasten off.
MUZZLE
Rnd 1: With size G hook and 1 strand beige, ch 4, 3 sc in 2nd ch from hook, sc in next ch, sc in last ch, working on opposite side
of foundation ch, sc in next ch, place stitch marker (see Pattern Notes). (8 sc) Rnd 2: [2 sc in each of next 3 sc, sc in next sc] twice. (14 sc) Rnd 3: Sc in next sc, [2 sc in next sc, sc in next sc] 6 times, sc in next sc. (20 sc)Rnd 4: Sc in each of next 3 sc,
2 sc in each of next 3 sc, sc in each of next 7 sc, 2 sc in each of next 3 sc, sc in each of next 4 sc. (26 sc)Rnd 5: Sc in each sc around.Rnd 6: Rep rnd 5.Rnd 7: Sc in each of next 5 sc, 2 sc in each of next 3 sc, sc in each of next 10 sc, 3 sc in each
of next 3 sc, sc in each of next 5 sc. (32 sc)Rnd 8: Sc in each of next 8 sc, 2 sc in each of next 12 sc, sc in each of next 12 sc. (44 sc) Rnd 9: Sc in each of next 8 sc, hdc in each of next 24 sc (center bottom of Muzzle), sc in each of next 12 sc, join (see Pattern
Notes) in next sc, leaving a 20-inch length of yarn, fasten off. (20 sc, 24 hdc)
EAR
Make 2.Rnd 1: With size N hook and 1 strand each espresso and sable, beg at top of Ear, ch 2, 5 sc in 2nd ch from hook, place stitch marker. Rnd 2: 2 sc in each sc around. (10 sc) Rnd 3: [Sc in next sc, 2 sc in next sc] 5 times. (15 sc) Rnd 4: Sc in each sc around, leaving a 10-inch length of yarn, fasten off
BODY
Make 4.
Row 1: With size N hook and 1 strand each espresso and sable, ch 12, sc in 2nd ch from hook, sc in each rem ch across, turn.
(11 sc) Row 2: Ch 1, sc in each of next 10 sc, 2 sc in next sc, turn. (12 sc) Row 3: Ch 1, sc in each sc across, turn. Row 4: Ch 1, sc in each of next 11 sc, 2 sc in next sc, turn. (13 sc)Row 5: Rep row 3. Row 6: Ch 1, sc in each of next 12 sc, 2 sc in next sc, turn.
(14 sc) Row 7: Rep row 3. Row 8: s Ch 1, sc in each of next 13 sc, 2 sc in next sc, turn. (15 sc) Rows 9–15: Rep row 3.Row 16: Ch 1, sc in each of next 13 sc, sc dec in next 2 sc, turn. (14 sc) Row 17: Rep row 3. Row 18: Ch 1, sc in each of next 12 sc, sc dec in next 2 sc, turn. (13 sc) Row 19: Rep row 3. Row 20: Ch 1, sc in each of next 11 sc, sc dec in next 2 sc, turn. (12 sc)
Row 21: Rep row 3. Row 22: Ch 1, sc in each of next 10 sc, sc dec in next 2 sc, turn. (11 sc) Row 23: Rep row 3. Fasten off.
LEG
Make 2.
Foot Bottom Rnd 1: With size G hook and 1 strand beige, ch 6, 3 sc in 2nd ch from hook, sc in each of next 3 chs, 3 sc in last ch, working on opposite side of foundation ch, sc in each of next 3 chs, place stitch marker. (12 sc) Rnd 2: 2 sc in next sc, sc in next
sc, 2 sc in each of the next 5 sc, sc in next sc, 2 sc in each of next 4 sc. (22 sc) Rnd 3: [Sc in next sc, 2 sc in next sc] around, join in next sc, leaving a 12-inch length, fasten off. (33 sc) .
Leg
Make 4.
Row 1: With size N hook and 1 strand each espresso and sable, ch 12, sc in 2nd ch from hook, sc in each rem ch across,
turn. (11 sc) Row 2: Ch 1, sc in each sc across, turn. Row 3: Ch 1, sc in each of next 9 sc, sc dec in next 2 sc. (10 sc)
Row 4: Rep row 2.Row 5: Ch 1, sc in each of next 8 sc, sc dec in next 2 sc. (9 sc) .Row 6: Rep row 2.Row 7: Ch 1, sc in each of next
7 sc, sc dec in next 2 sc. (8 sc)Rows 8–12: Rep row 2. At the end of row 12, fasten off.
ARM
Make 2.Palm
Row 1: With size G hook and 1 strand beige, ch 4, sc in 2nd ch from hook, sc in each of next 2 chs, turn. (3 sc)Row 2: Ch 1, 2 sc in first sc, sc in next sc, 2 sc in next sc, turn. (5 sc) Row 3: Ch 1, sc in each sc across, turn. Row 4: Ch 1, 2 sc in first sc, sc in each of next 3 sc, 2 sc in last sc, turn. (7 sc) Row 5: Rep row 3.Row 6: Ch 1, 2 sc in first sc, sc in each of next 5 sc, 2 sc in last sc, turn. (9 sc) Rows 7–9: Rep row 3. At the end of last rep, leaving a 12-inch length, fasten off.
Outside of Arm
Row 1: With size N hook and 1 strand each espresso and sable, ch 4, sc in 2nd ch from hook, sc in each of next 2 chs, turn. (3 sc)
Row 2: Ch 1, 2 sc in first sc, sc in next sc, 2 sc in next sc, turn. (5 sc) Row 3: Ch 1, sc in each sc across, turn. Row 4: Ch 1, 2 sc in first sc, sc in each of next 3 sc, 2 sc in last sc, turn. (7 sc) Rows 5–10: Rep row 3. Row 11: Ch 1, sc dec in next 2 sc, sc in each of next 3 sc, sc dec in next 2 sc, turn. (5 sc) Row 12: Rep row 3. Row 13: Ch 1, sc dec in next 2 sc, sc in next sc, sc dec in next
2 sc, turn. (3 sc) Row 14: Rep row 3, leaving a 12-inch length of espresso, fasten off.
Underside of Arm
Row 1: With size N hook and 1 strand each espresso and sable, ch 8, sc in 2nd ch from hook, sc in each rem ch across,
turn. (7 sc) Rows 2–7: Ch 1, sc in each sc across, turn. Row 8: Ch 1, sc dec in next 2 sc, sc in each of next 3 sc, sc dec in
next 2 sc. Fasten off. (5 sc)
ASSEMBLY
Use photo as a guide for Bear assembly.Holding RS tog of row 11 of Back of Head and row 7 of Forehead tog, sewing through both thicknesses across 3 sts.With RS facing, sew Side of Head to Back of Head first and then to Forehead. Sew row 1 (7-st width) to side edge of the Forehead and length (side edge of rows 1–12) to Back of Head.Fold Muzzle in half lengthwise and mark center st along top and bottom edges (between 12 and 13 hdc sts is center bottom). Pin Muzzle centered under Forehead. Bottom inside corner of Side of Head should be pinned to 5th st from center bottom marker. Sew Muzzle in place.Secure eyes just above Muzzle
with 9 sts sk between eyes.
Thread tapestry needle with 20-inch length of black embroidery floss. Beg at center of rnd 1 of Muzzle, embroider a straight line down approximately 1? inches and a straight line for mouth, outward on each side ? inch.
For nose, cut a ?-inch x 1?-inch oval from black felt and glue centered over Muzzle.For Ears, with rem length, work-ing through both thicknesses, sew rnd 4 flat across.
Center each Ear over front seams of the Forehead and on top of the center seam of the Head, and sew to Head.Stuff Head with fiberfill.For Body, to form center front seam, holding 2 Body sections RS facing and working through both thicknesses, sew rows 1–23 tog. To form center back seam, rep with rem 2 Body sections. Holding RS facing of front and back tog and working through both thicknesses, sew both side seams. Turn RS out.Sew top opening of Body to Head opening.
Sew a portion of bottom Body closed, leaving 3-inch opening. Stuff Body with fiberfill and sew opening closed.For each Arm, sew Palm to end of Underside of Arm. Sew Out-side of Arm to Palm and Underside of Arm leaving top opening unsewn, stuff Arm with fiberfill.
Sew Arms to each side of Body 1 inch below joining of Head.For each Leg, sew 2 Leg sections tog to form a tube, sew Foot
Bottom to 1 end of tube. Stuff Legs with fiberfill. Place Bear in sitting position, place Legs at front of Body leaving a 2?-inch
sp between Legs and sew in place to Bear
Design by Eve Leder
See also more patterns for knitted toys
Don’t miss new pattern with adorable sleeveless jumper for women
Related Posts:
- Knitted tunik (Tikal Tunic)-free knitting pattern
-free knitting pattern")
- Easy knitting-Child's Hooded Scarf -free knitting pattern

- Knitted cowl and hat. Free knitting pattern.

- "Cookies & cream"- knitted sweater. Free knitting pattern

- Knitted hat for women. Free pattern.

- Double Breasted knitted vest – Free knitting patterns

- Knitted pullover for men with zip

- Free pattern " Knitted women's two piece suit"
